Segregate your household waste
The first step to composting is segregation of waste
I have two dustbins in my home.
One is for kitchen waste (vegetable, fruit scraps, peels, egg shells, coffee grounds etc and other organic matters).
The other one is for toxic waste (glass, plastic, medicines, wrappers, used batteries etc).
I recycle newspapers, milk covers, plastic cans and glass bottles.
Tips – You can have green color dustbin for organic waste and red one for toxic waste.
What to compost? How should I compost ?
Green matter = High nitrogen
Vegetable and fruit peels and scraps (except citrus fruits)
Coffee grounds
Tea bags
Flowers
Grass clippings
Egg shells (has to be crushed before adding)
Brown matter = High carbon
Dry leaves
Saw dust
Small wood chips
Straw or hay
Wood ash
What not to add
Cooked food as it decays and gives a bad odour, so it is best to avoid adding it.
Meat, bones as it attracts rats and smells bad
Pet waste
Batteries
Diseased plants
Medicines
Plastic bags
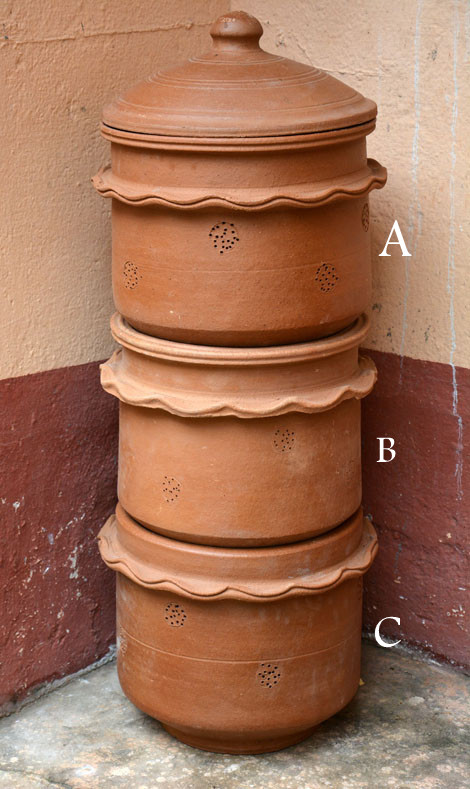
#1. Composting Using Kambha
The bottom Unit or Unit C is for storing the almost done compost and does not have plastic woven wire and is close at the bottom. It remains always in the bottom.
First step is preparing your Kambha
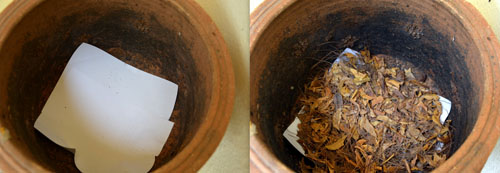
The bottom Unit C should be layered with 4 inches of dried leaves that acts like a bed for the water that gets discharged during decomposition.
Place a paper or newspaper in unit A to cover the weave. This is done to prevent waste from falling through the plastic weave to the bottom most unit C.
Then layer with dry leaves (pic below). You can also add 4 fistful of remix powder which is available in dailydump store. I did not add.
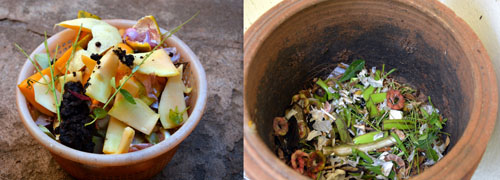
The add your organic kitchen waste. If time permits, you can shred it into smaller pieces and add as it will fasten the process of composting.
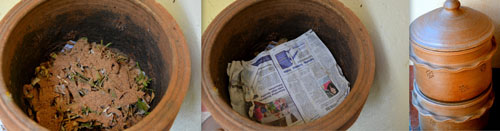
Give it a good mix using a small rake or a stick twice a week for good aeration. Add a little buttermilk or semi composted material to start off the decomposition process.
Check the moisture level every time, you mix the pile. Sprinkle a little water and mix well, if the pile is dry. Add more BROWNS, if it is wet or soggy and mix well.
Once Unit A is full, shift Unit A to the middle and bring Unit B to the top.
Start filling Unit B – follow the same process above.
When Unit B is full, empty the half done compost from Unit A to Unit C to mature. Then shift Unit A to the top and start filling it with waste following the same process above. Like this you have to interchange Unit A and Unit B. Unit C will always remain in the bottom.
It will take 2-3 months to fully compost depending on the temperature.
Once compost in Unit C is done, sieve it and use it. You can add the remains back to the Unit A or B.
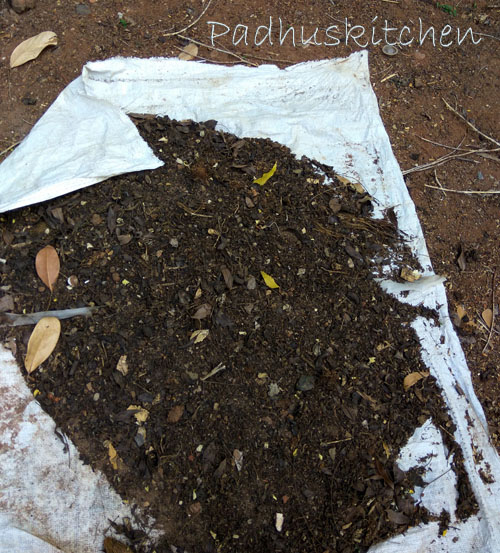
A fully done compost is dark brown and smells like earth.
#2.How to compost using a plastic bucket or a pot.
You will need
Any old plastic bucket or terracotta pot
Kitchen waste and dry leaves (greens and browns)
Preparing the bucket/terracotta post for composting
Line the bottom of the bucket with a layer of soil. Now add your kitchen waste (green matter) and cover it with saw dust or dry leaves (brown matter).
Add a little buttermilk or semi composted material or even a little cow dung to start off the decomposition process. Keep it covered to prevent smell and to keep off insects. You can use any old wooden board or anything to cover it.
Mix the pile once or twice a week for aeration. If you find the pile dry, sprinkle some water and mix it well. If it is soggy, add more dry leaves or saw dust and give a good mix. Make sure the pile is damp. It should not be too dry nor too wet.
Keep adding a mix of greens and browns everyday until the bucket A is full.
While Bucket A is preparing the compost, you can use another bucket (let us name it Bucket B) and repeat the same process above. Make sure to stir both Bucket A and B twice a week.
You can have a Bucket C for storing almost done compost.
It will take 45-60 days to fully compost depending on the temperature.
#3.Composting by digging a pit
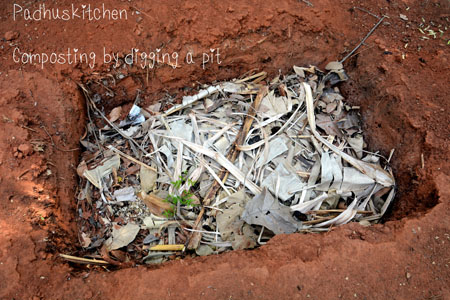
#4. Click the link to know about Composting by using a Holding Unit
MAINTENANCE FOR ANY COMPOST BIN or KAMBHA
I am practicing all the methods of composting mentioned above with success. Whatever your method of composting, the same rule applies for composting. Read below –
1. Food
Microbes need 2 kinds of food to do their work. Green and Browns
2.Air
Proper aeration is ensured by turning or mixing the pile at regular intervals.
3.Water
Check the moisture level every time you mix the pile. If the pile is too dry, decomposition will not take place. Sprinkle needed water and mix the pile well evenly.
Tips for faster decomposition
View Comments (15)
how do you recycle milk cover , paper etc. Milk cover difficult I would like to follow
I use all one side papers. Milk covers and all scraps, I get rid of it via a kabadiwala.They use for recycling.
Great Padhu.
Awesome padhu
Great idea...
What do I do with the after food waste like red chillis and drumstick? Are they compostable?
Yes, you can add food waste like red chillies and drumstick but do not add leftover or cooked food.
Thanks Padhu
Please tell me full procedure of organic manure by kitchen waste by digging in the soil
Kindly let me know what should i do in case of leaching. I use a plastic basket for preparing manure. Since last few days, its undergoing leaching by creating water.
You can use that water for plants.
Hi Madam,
I used tea powder directly as manure, but it attracted ants. How to avoid this ?
Add turmeric powder to get rid of ants.
A very details description, will help and motivated me to start with composting. Thank you.