Myself and my daughter baked these garlic rolls some 10 months back. The pictures were in my folder waiting to be posted for such a long time. Since the pictures were taken with my old point and shoot camera, I did not feel like posting it. But the recipe is too good. This is my first attempt in making breads and I was happy that it turned out super soft and flavorful.
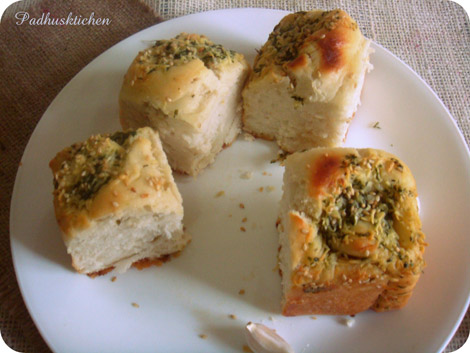 |
| soft and flavorful garlic rolls |
Garlic Rolls from scratch
Source –mysingaporekitchen
Eggless Garlic Rolls-Garlic Pull Apart Rolls-(from scratch)

Prep Time : 20 mins(excluding resting time)
Cook Time : 30 mins
Yields: 4 Garlic Rolls
Recipe Category: Breakfast-Baking
Recipe Cuisine: International
Author:Padhu Sankar
Yields: 4 Garlic Rolls
Recipe Category: Breakfast-Baking
Recipe Cuisine: International
Author:Padhu Sankar
Ingredients needed
All purpose flour/ maida- 1 1/2 cups
Warm Water- 1/2 cup
Active Dry Yeast- 1/2 tbsp
Salt – 1/2 tsp
Sugar- 1 tbsp
Virgin Olive Oil -1 1/2 tbsp
For making garlic spread
Salted Butter- 50 grams
Garlic- 2-3 cloves grated
Coriander leaves – finely chopped – 2 tbsp
Preparation
Grease and flour the pan.
Proofing of Yeast – Proofing is done to see if the yeast is fresh and active.
Dissolve a little sugar (1/4 tsp) in lukewarm water. Add active dry yeast and stir it to dissolve.
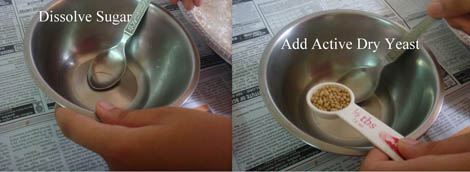
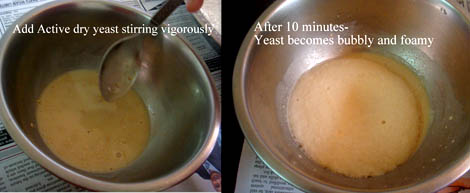
Leave it undisturbed for 10 minutes. After 10 minutes, if the yeast is good, it will bubble and foam up. If it does not become foamy, your yeast is not working. Probably the yeast used was old or the water you added was too hot or too warm or too cold.
Method
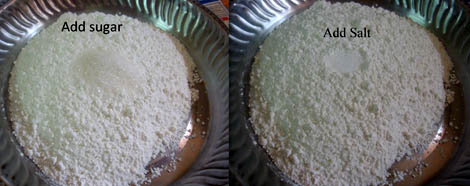
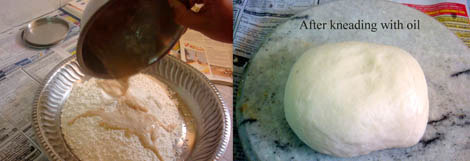
Mix together flour, sugar, salt, yeast with warm water and knead until you get a smooth dough.
Then add oil to the dough and knead well again. When you press with your finger, the dough should bounce back to its original shape. Kneading the dough is very important. You can check this video on how to knead bread dough. Apply oil on the dough and place it in a greased bowl. Cover it with a cling film or a kitchen towel and allow it to rise for 45-50 minutes undisturbed.
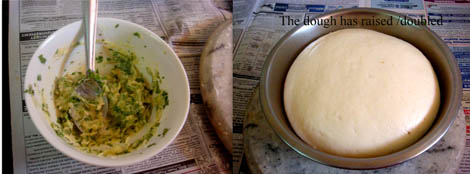
Meant time we will prepare the garlic spread. Mix salted butter, grated garlic and coriander leaves together to form a paste. Your garlic spread is ready.
After 50 minutes – The bread dough has doubled its initial size (pic below). Knock down the air in the dough with your fist. (punch the dough)
Now roll the dough (1/2 inch thick) using a rolling pin more like a rectangle. Dust flour to prevent it from sticking.
Apply around 1-1/2 tbsp garlic spread on it.
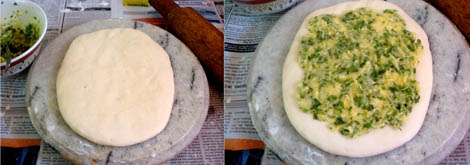
Now roll it with the garlic spread inside. Cut it into 2 equal halves, then further cut that 2 parts into 2 again. So you will be having 4 rolls.

Place the rolls in a greased baking pan with the cut side up as shown in the picture. Apply the remaining garlic spread on top. Brush the rolls with milk or egg if preferred. Sprinkle sesame seeds and leave it covered and undisturbed for another 20 minutes.
In the meantime, preheat the oven at 180 degree C for around 15 minutes.
Bake for 20-25 minutes or until the top starts browning and you get a nice aroma of roasted garlic and bread.
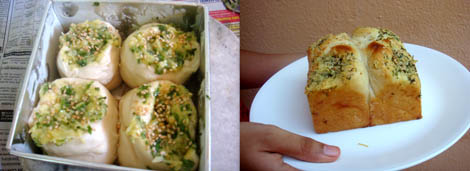
Soft and flavorful garlic bread is ready. Have it as such or with soup for dinner.
Note
The quantity of water depends on the brand of flour used. It may be a little more or a little less than 1/2 cup of water.
If you want a soft bread, use good quality fresh yeast.
The garlic spread can be stored in the refrigerator for a week.
If you found this post useful, I would really love it if you pin it or share it with your Facebook fans or Twitter followers or Google+ circles today. All it takes is a simple click on the “pin it” “like,” “share,” “tweet,” or Google+ buttons below the post. It will keep me motivated. Thank you!

These look so yummy…
Perfectly baked rolls.. Looks delicious..
Can`t wait to try this recipe. Thank you.
wow..looks yummy.. 🙂
delicious ..look so soft and the way you share the steps pics it will be very helpful even for the beginners…..
Just love the garlic buns
Hi nice recipe…Just a small doubt in which rack it should be baked..(middle/upper/lower)
Wow… It looks simple and delicious. I might try this recipe this week. If I do, I'll wordpress it with the link back to your blog 🙂
Bindumolleti – Keep it in the middle rack.
they looks super flavored and delicious
Oh yummy bread rolls! looking perfect delicious!
I tried these…..they turned out perfect and tasted soooooooo yuuuuummmmy 🙂 thanx a ton for the recipe
how much water is to be used while proofing the yeast??
I tried baking these using the cooker-sand method as I do not have an oven .. It turned out a big hit and my family just loved it so much! Thanks for such a yummilicious recipe! 🙂
Can you please tell me what brand of active dry yeast you used?
I tried twice but dough didnt rise at all..
the yeast package is not expired.
pls help..
Shobhana – I buy blue bird. That has happened to me also.Though the yeast was not expired it did not work. So I had to buy a new pack.
Padu I have never baked anything so far. But I want to buy a OTG. Could you kindly suggest me a good brand with less electric consumption. We are only two and plan to bake and grill
Nandini Nayak – Personally I feel OTG is best for baking. I have Morphy Richards OTG oven18 lts. It has not given me any problem so far. It can be used for baking and also grilling. I grilled my paneer tikka only in that. Electricity consumption-not much.
Dear Padhu,
Today I made eggless Garlic Rolls exactly as directed by you. They turned out very nice. Thanks for the recipe. I have become a big fan of yours. I will keep trying your recipes & will keep you posted. Thanks once again. ……Kiran Tendle, Mumbai.
I am using Morphy Richards 24rss otg I want to try making this garlic rolls.shall I preheat my oven to 180 degree for 15 mins or 10 mins.pls reply.
Yes, Rashmi, you can pre heat at 180 degree C for 15 minutes. Baking also same 180 degree C.
Hi….
I would like to try your recipe. But could you tell me if I use Instant Yeast how much should I use?? is it the same amount as the active dry yeast??
You have to reduce it a little – check instructions on the pack as to how to proof the yeast. Read more about yeast in the link below – http://www.thefreshloaf.com/faqs/baking/yeast
THE blog to look up to for fuss free cooking. No frills. Just ease without compromising on taste. Thanks a ton for such a lovely blog. Even these recipies are demystified here!!! Great!!!
Can we use whole wheat flour instead of maida? If yes, what would be the temperature of baking?
May be you can try with half maida and half wheat flour. I have not yet experimented this recipe with whole wheat flour. Temperature will be the same.
Dear padhu, i m new to baking. Bt love to make breads and rolls. I am a lil confused abt preheating.. I have a convection option on my oven. And once I set the temperature and start it off, it preheats automatically and beeps in a while. So… I dnt understand why the number of mins is given for preheating. Pls clarify
Each oven is different. In my OTG oven, I have to set the preheating time. That is the reason I give the time for preheating.
Tried this recipe… It came out simply awesome… My family loved it….
Thanks for the recipe..It was simple and came out very tasty …it has become a favorite with my daughter .